Got more questions? Check out our FAQ
To get a hi! plan, you’ll need to fulfil these requirements:
1. Be 16 years or older
2. Have a Singpass account or any of the these ID documents to sign up:
Make sure that:
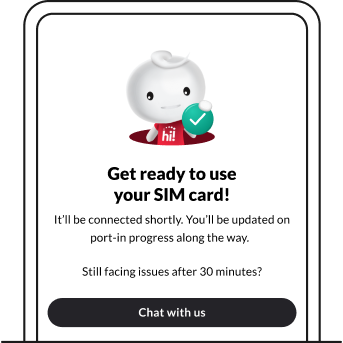
Port-in takes 1–3 working days and you’ll receive SMS updates along the way. In the meantime, we’ll assign you a temporary number.
eSIM
You’ll get an email to install your eSIM shortly after purchase.
SIM card
Port-in starts once you’ve received your SIM card. We’ll send you an email to activate your SIM and set up your temporary number.
When port-in completes, we’ll do a seamless switch to your current number.
eSIM
To get started, make sure your device is eSIM compatible.
Most devices can accommodate at least 5 eSIMs but you can only have 2 active mobile lines at a time. This includes combinations of physical SIM and eSIM, or 2 eSIMs.
Note: Dual eSIM support is not widely available across most devices yet. Check with your device manufacturer to be sure.
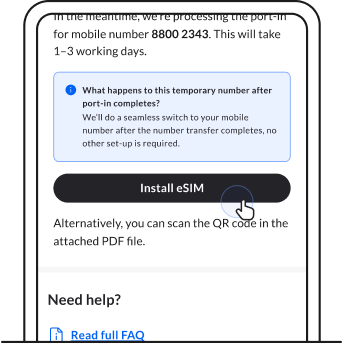
1. Open your eSIM installation email on the device you want to install it on, then tap Install eSIM. If you’re porting in, simply set up your temporary number with the same steps.
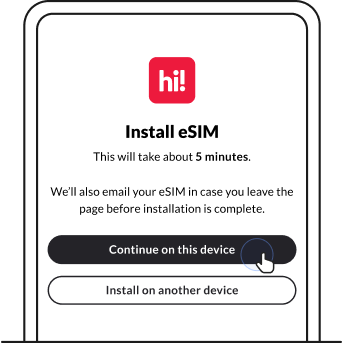
2. You’ll be brought to Singtel hi! app. Tap Continue on this device.
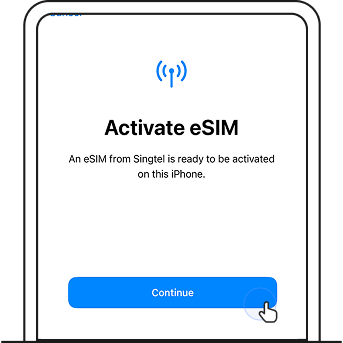
3. Tap Continue to start eSIM installation.
4. If you’re stuck on this screen, find out how to resolve this via eSIM troubleshooting.
Label your new eSIM (device-dependent).
If you already have an existing SIM in your device, you’ll see the option to label your mobile lines. Give your new eSIM a name so you can identify it.
Important to note: Your current SIM will show up on the top, while your new eSIM will show up at the bottom.
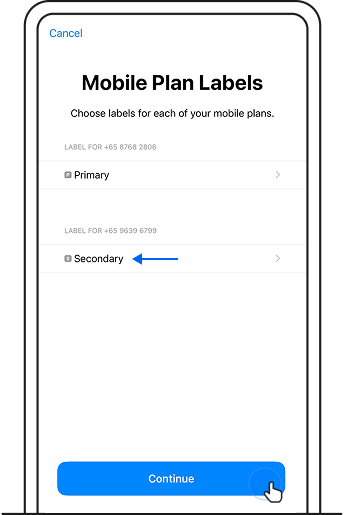
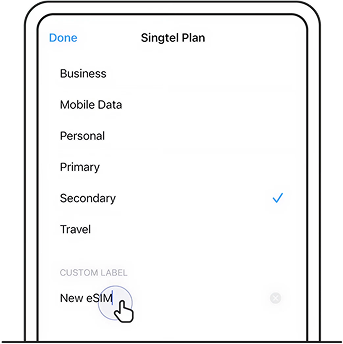
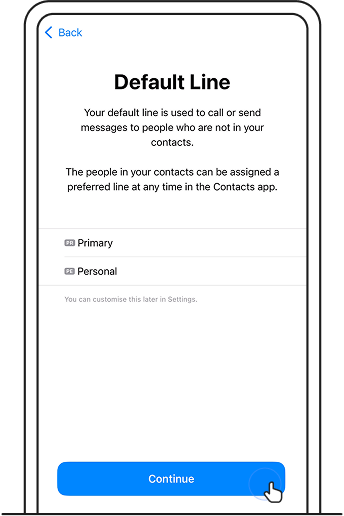
5. Choose your default mobile line. Tap on the line you want to set as your default. This will be the number you make calls and send texts from. Then, tap Continue.
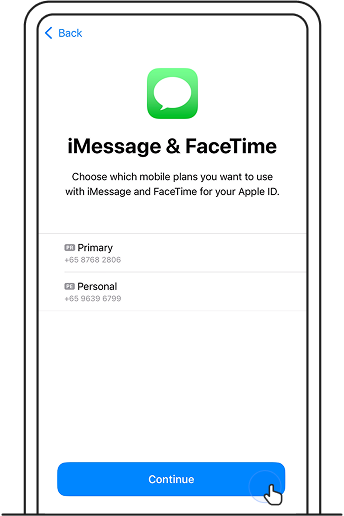
6. Choose which mobile line you want to use with iMessage and FaceTime.
Tap on the number you want to use iMessage and FaceTime with. You can choose either or both numbers. Then, tap Continue.
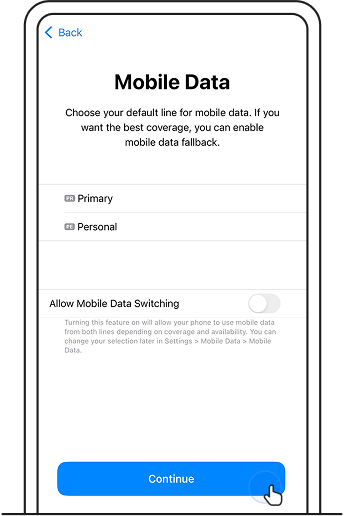
7. Choose which mobile line to use for mobile data.
Tap on the number you want to use for mobile data. Then, tap Continue.
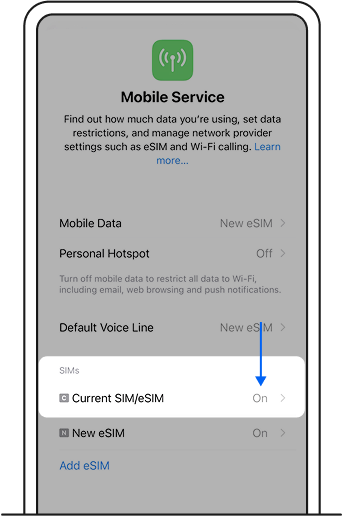
8. Make sure your new eSIM is toggled On.
If you want to change your default line settings in the future, you can find it device settings: Settings > Mobile Service.
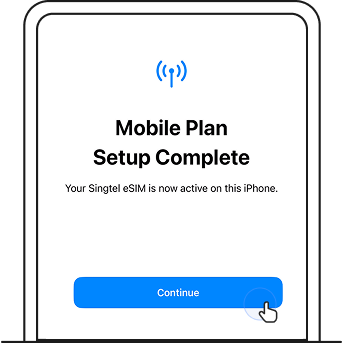
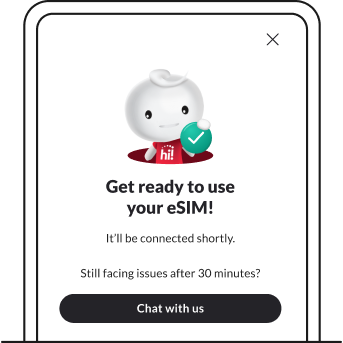
9. Once eSIM is installed, you’ll see this screen on Singtel hi! app.
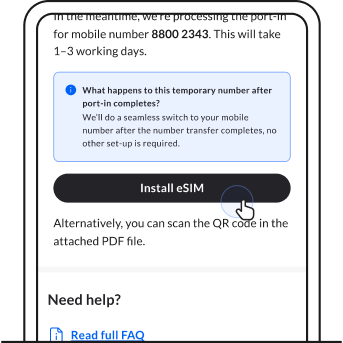
1. Open your eSIM installation email on the device you want to install it on, then tap Install eSIM.
If you’re porting in, simply set up your temporary number with the same steps.
2. You’ll be brought to Singtel hi! app. Tap Continue on this device.
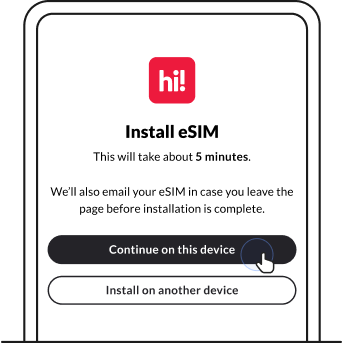
3. Your eSIM will begin installing. This may take a few minutes. Don’t leave the page.
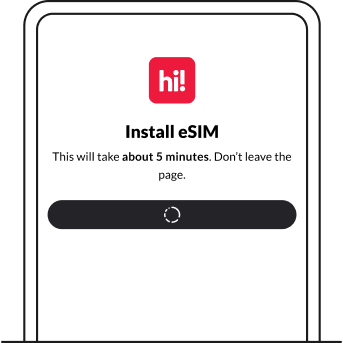
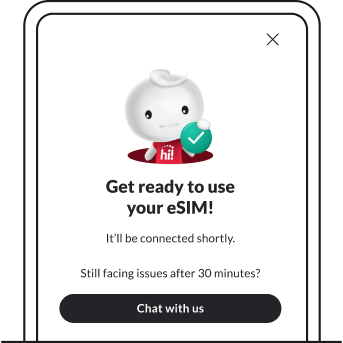
4. Once eSIM is installed, you’ll see this screen on Singtel hi! app.
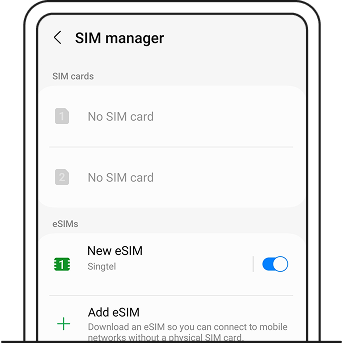
5. To check that your eSIM is installed successfully, go into Settings > Connections > SIM manager. Make sure your new eSIM is toggled on.
Have your eSIM email ready before you start.
1. Delete eSIM from your current device. You can do this under your device settings.
2. Open your eSIM installation email and start installation from there.
Did not receive eSIM email
Check your junk or spam folders under the email address provided when you made the purchase.
You should receive your eSIM email within 15 minutes after purchase. If you’re still facing issues, chat with us.
Receive “unable to activate eSIM” message (iOS)
This happens when your eSIM has been successfully installed, but your line is not activated on your new eSIM yet.
Leave the page first. You can continue using your device while awaiting activation.
When this occurs, your eSIM should display as “Activating” under Settings > Mobile Service.
Stuck at “activate eSIM” screen (iOS)
This happens when your eSIM has been successfully installed, but your line is not activated on your new eSIM yet.
Leave the page first. You can continue using your device while awaiting activation.
When this occurs, your eSIM should display as “Activating” under Settings > Mobile Service.
Receive “plan is already in use” message (Android)
This happens when your eSIM is already installed on a mobile device, but you’re attempting to install the eSIM again.
Transferring your eSIM to a new device? Make sure that you’ve deleted the eSIM from your previous device first. Then, install your eSIM on your new device following the instructions in your eSIM installation email.
No mobile data, calls or SMS on eSIM after successful installation
Follow these steps:
1. Make sure that the device you are installing your eSIM on is connected to the internet.
2. Check that your device is eSIM-compatible.
3. Follow the steps in your eSIM email.
If you’re still facing issues, chat with us.
SIM card
1. After receiving your SIM card, you’ll get an email to set it up. Tap Set up SIM card.
Did a port-in? You’ll be assigned a temporary hi! number. Follow the same steps to set it up.
We’ll do a seamless switch to your mobile number after port-in completes, no other set-up is required.
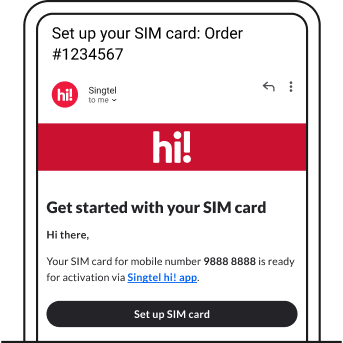
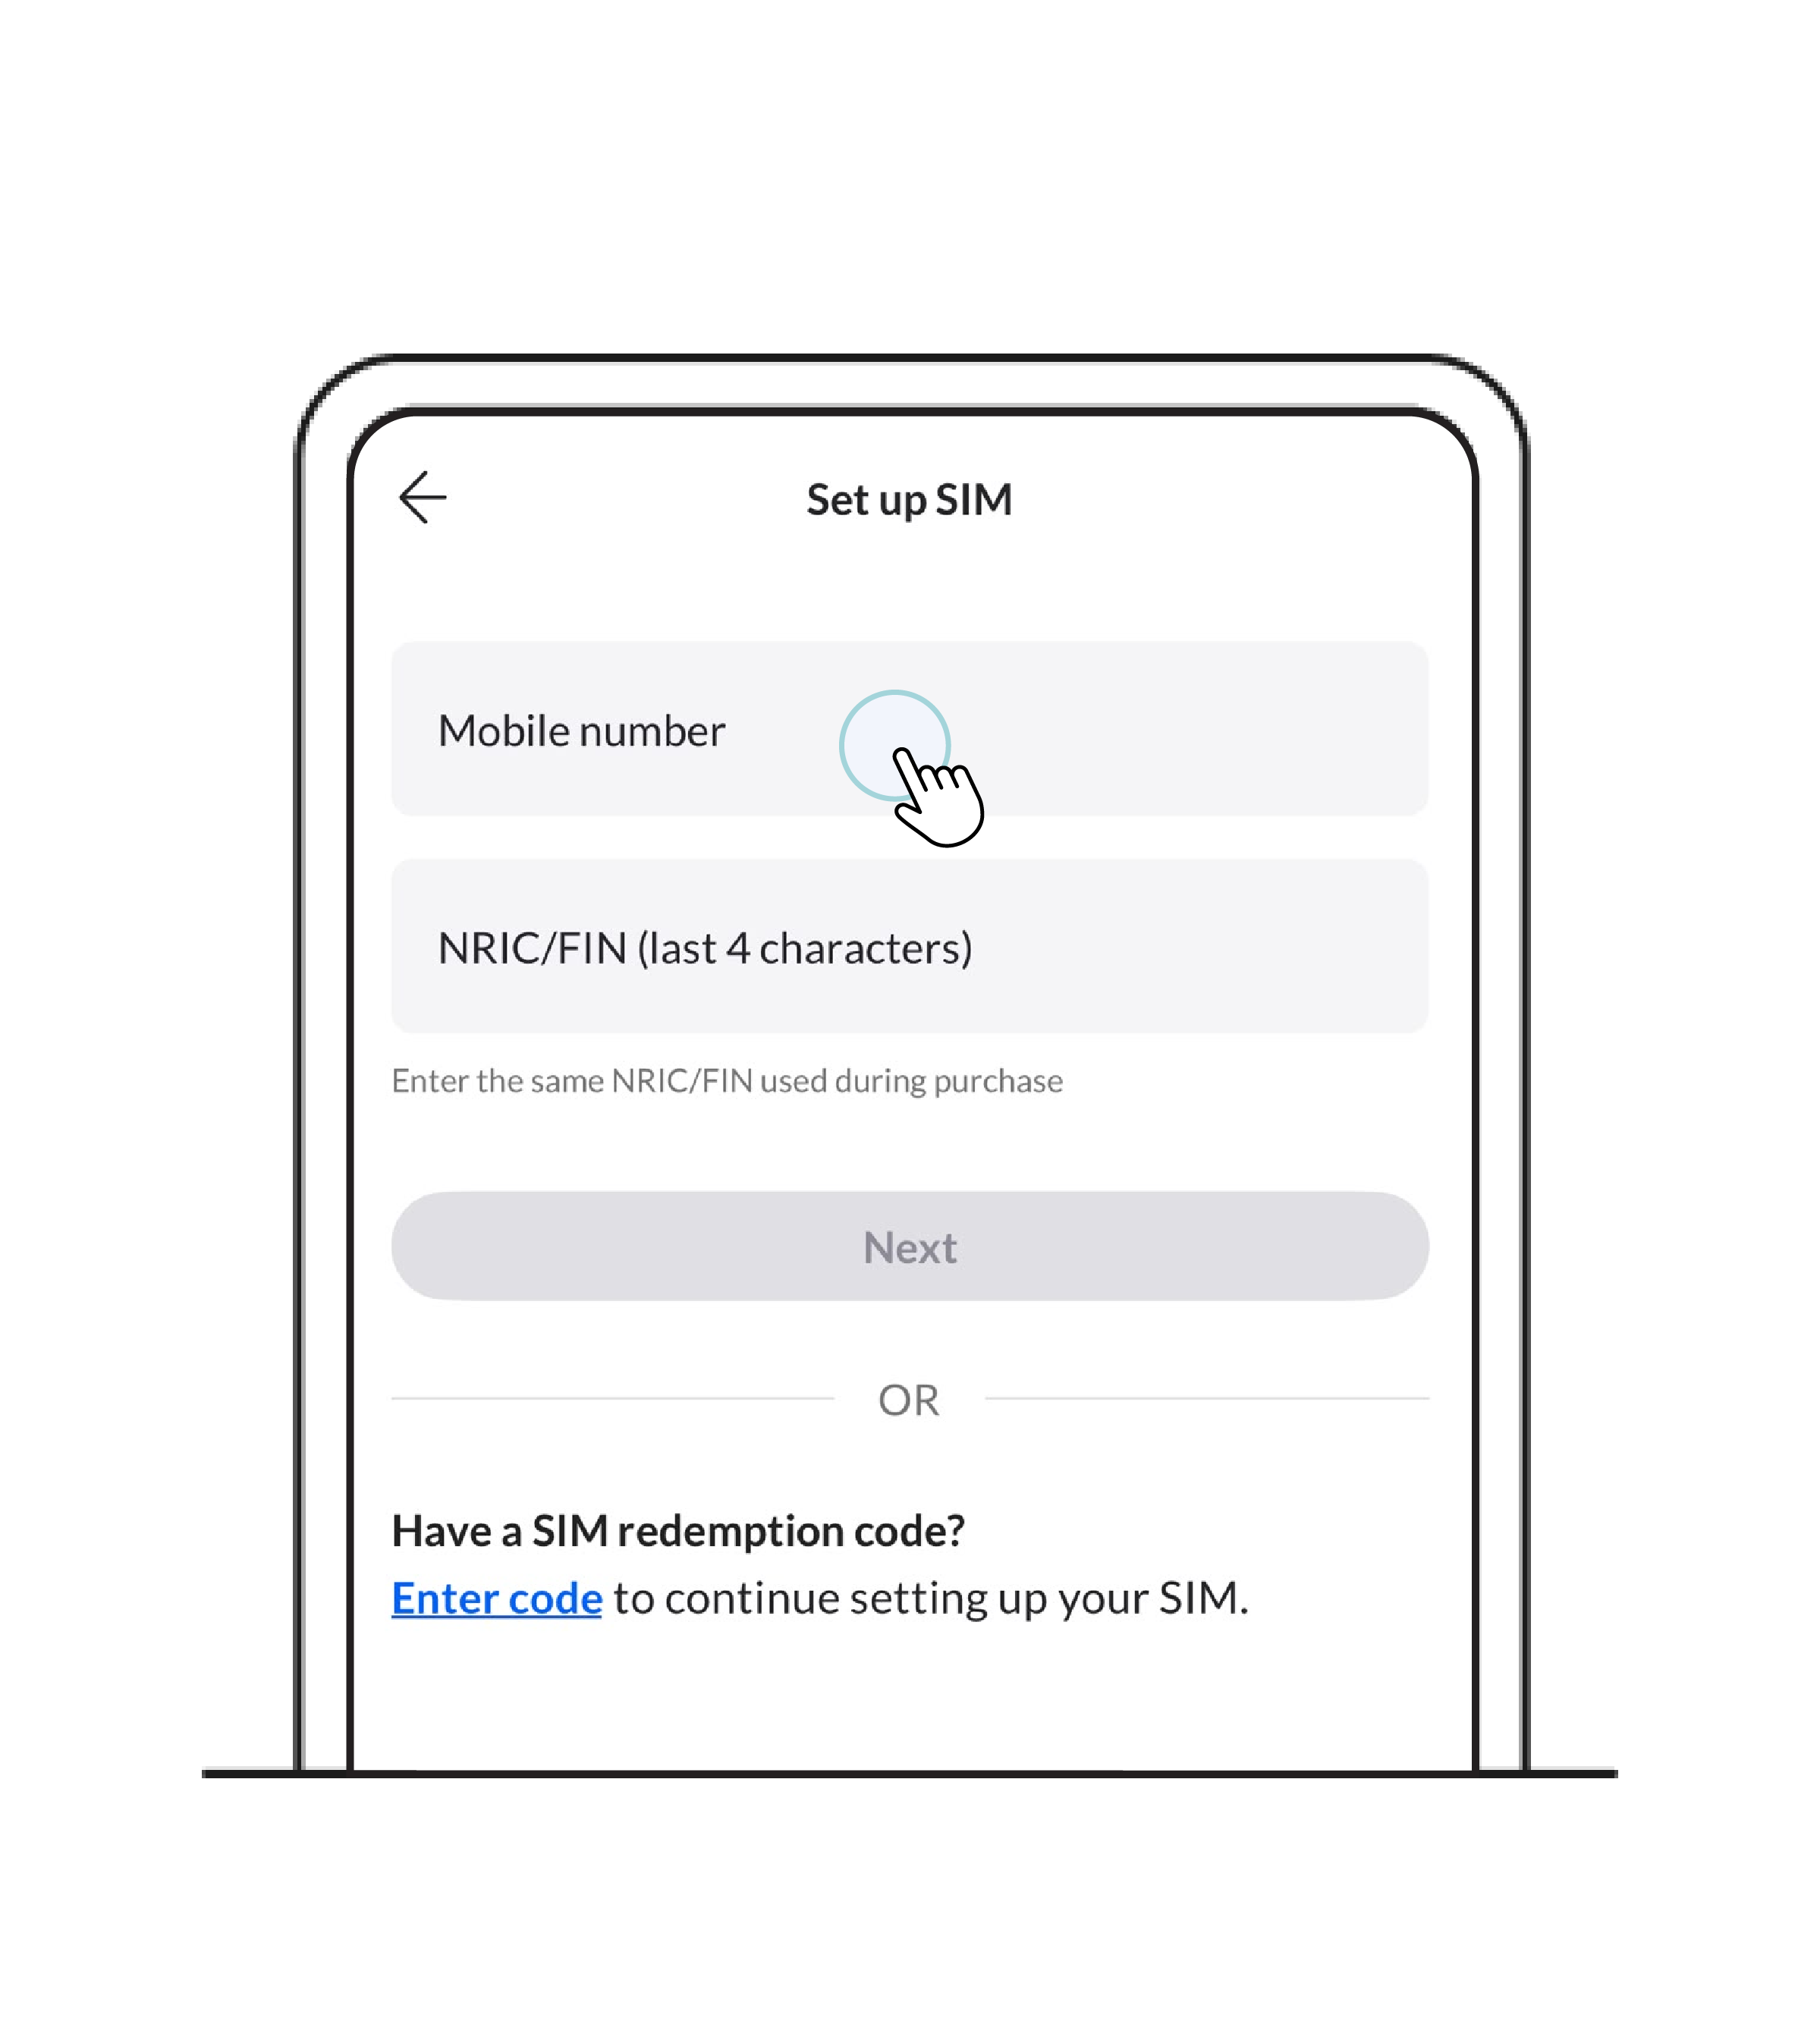
2. You’ll be brought to Singtel hi! app. Enter your details and tap Next.
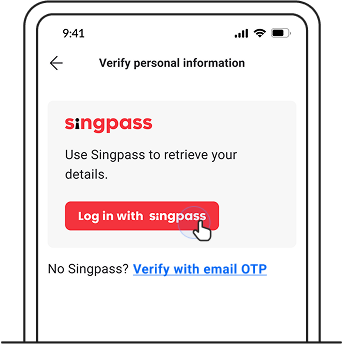
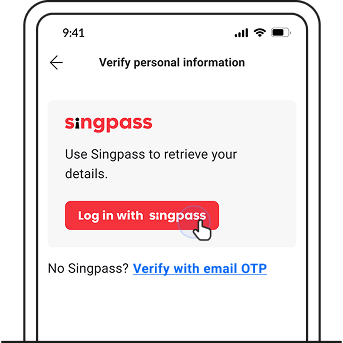
3. Tap Log in with Singpass to complete verification.
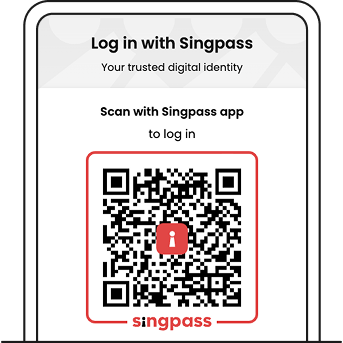
4. After verification, your SIM will be ready for use shortly.
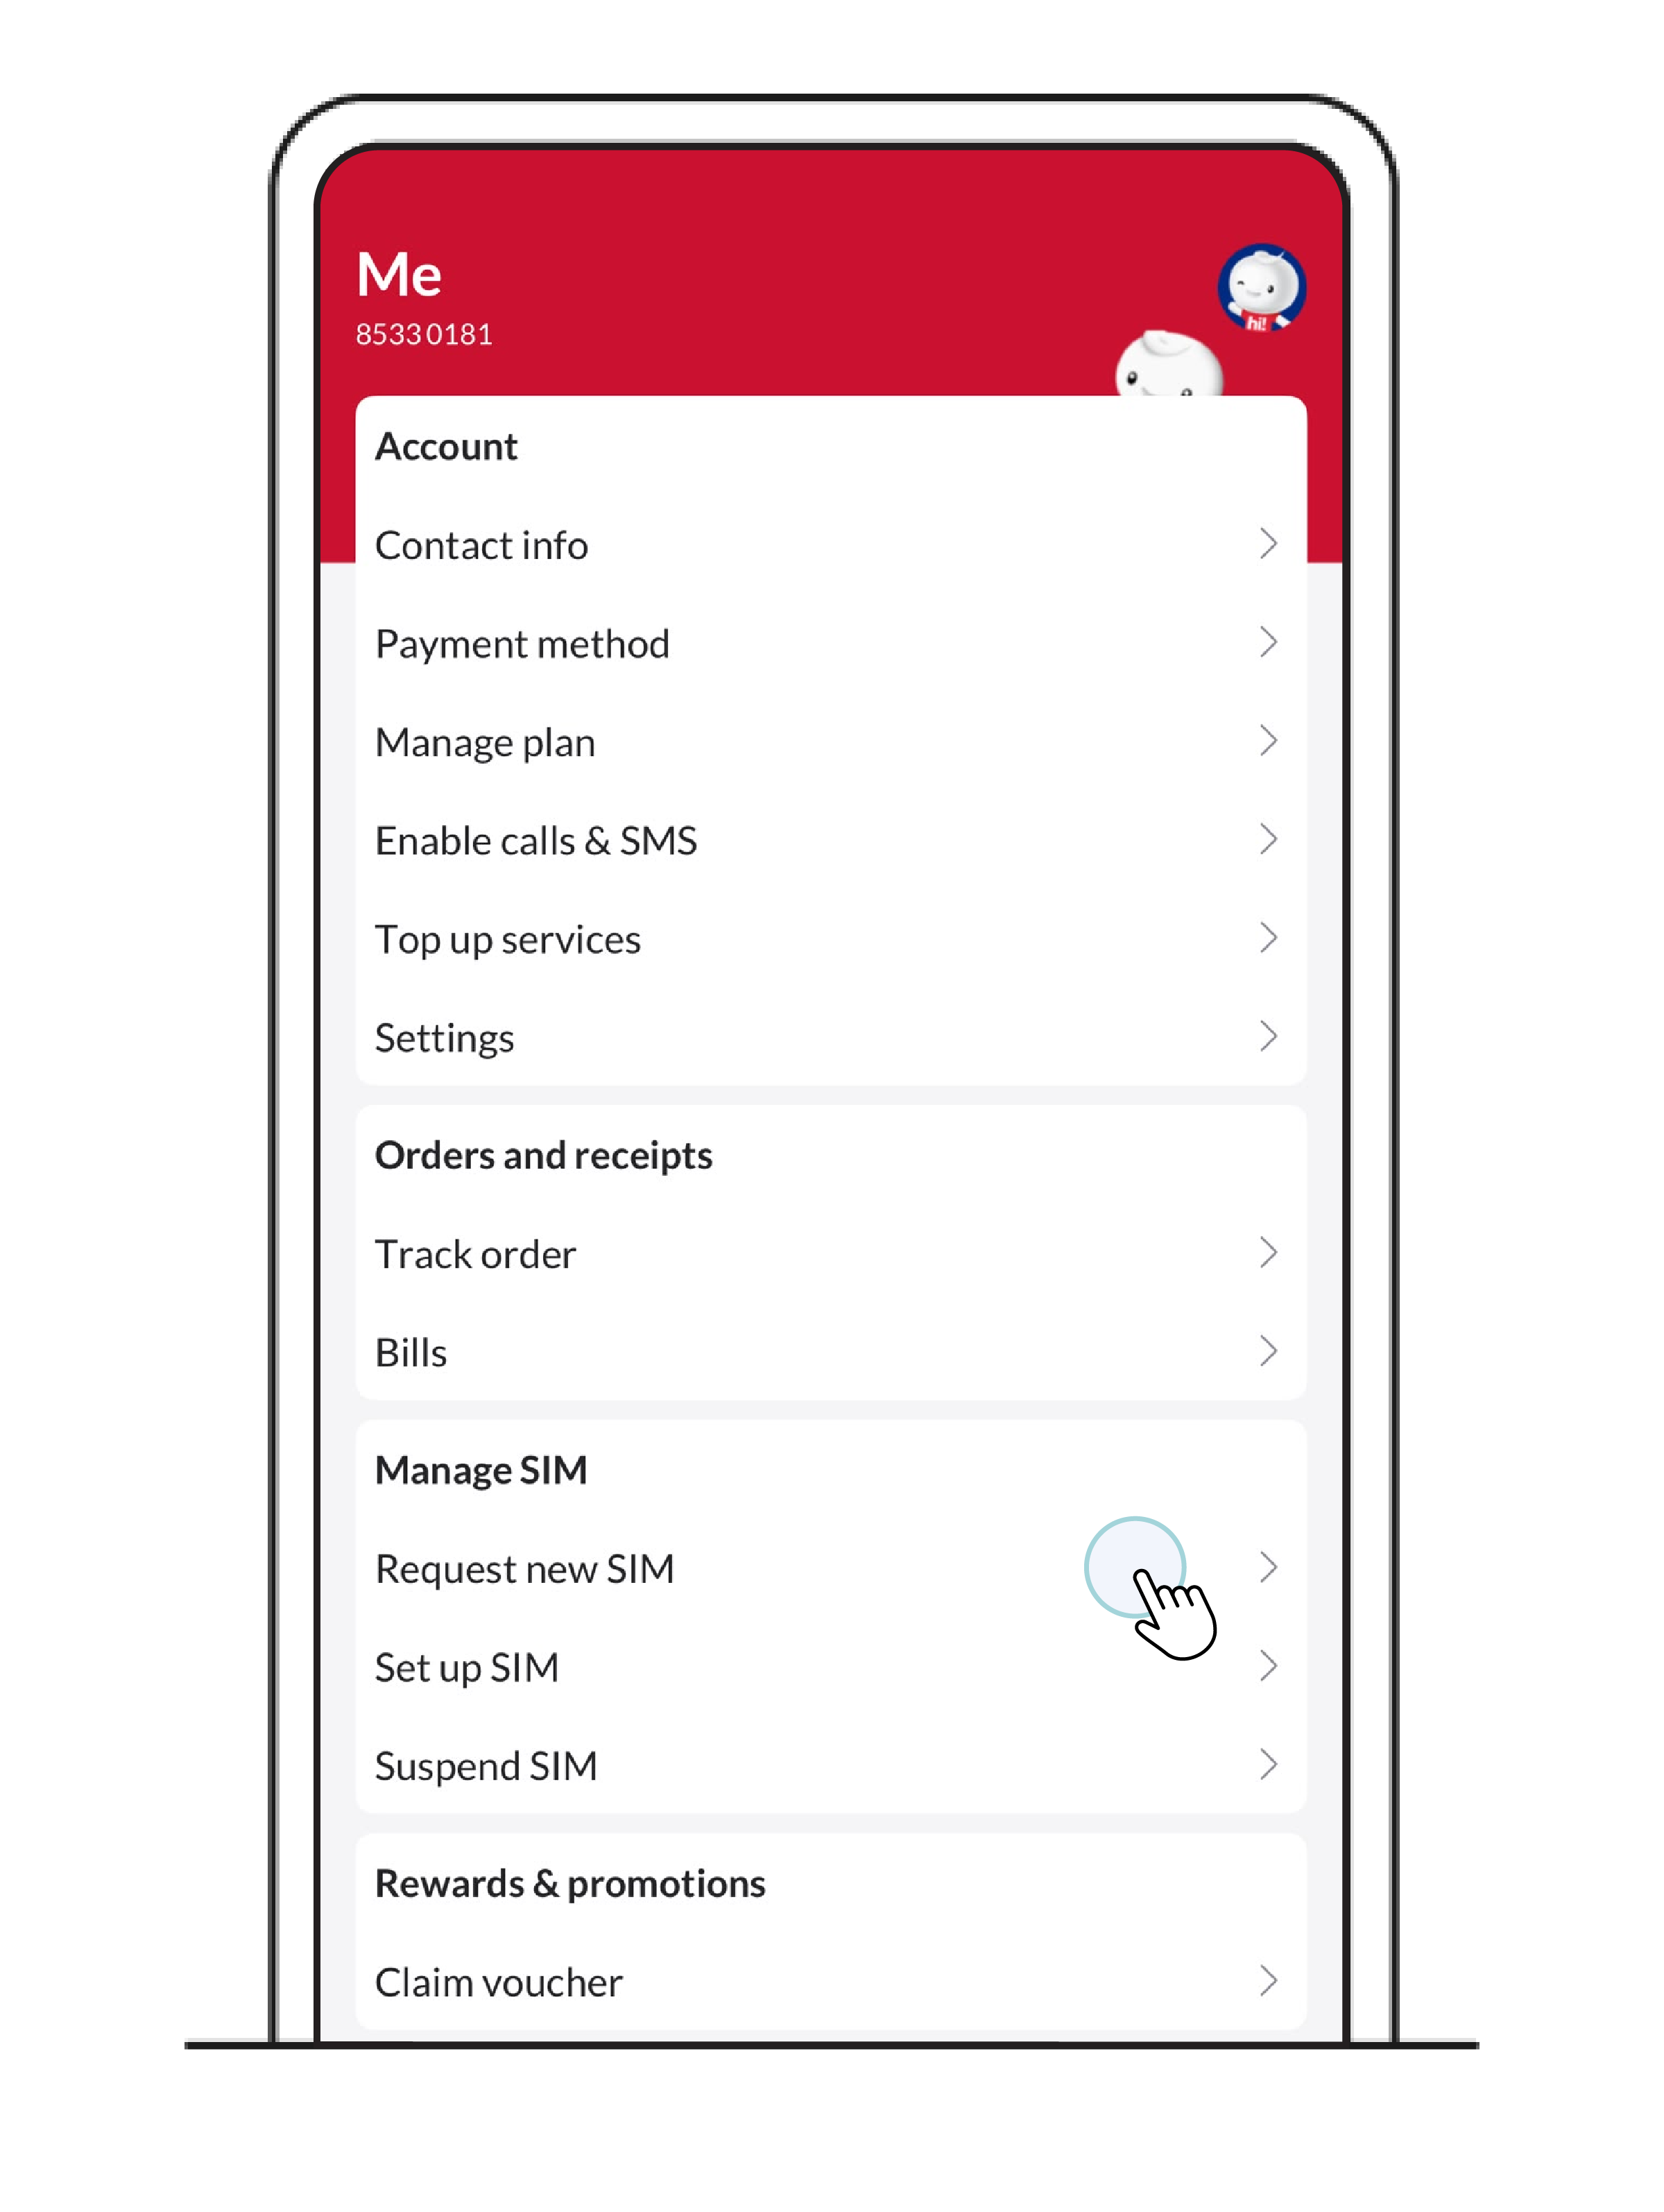
1. Log in to Singtel hi! app > Me.
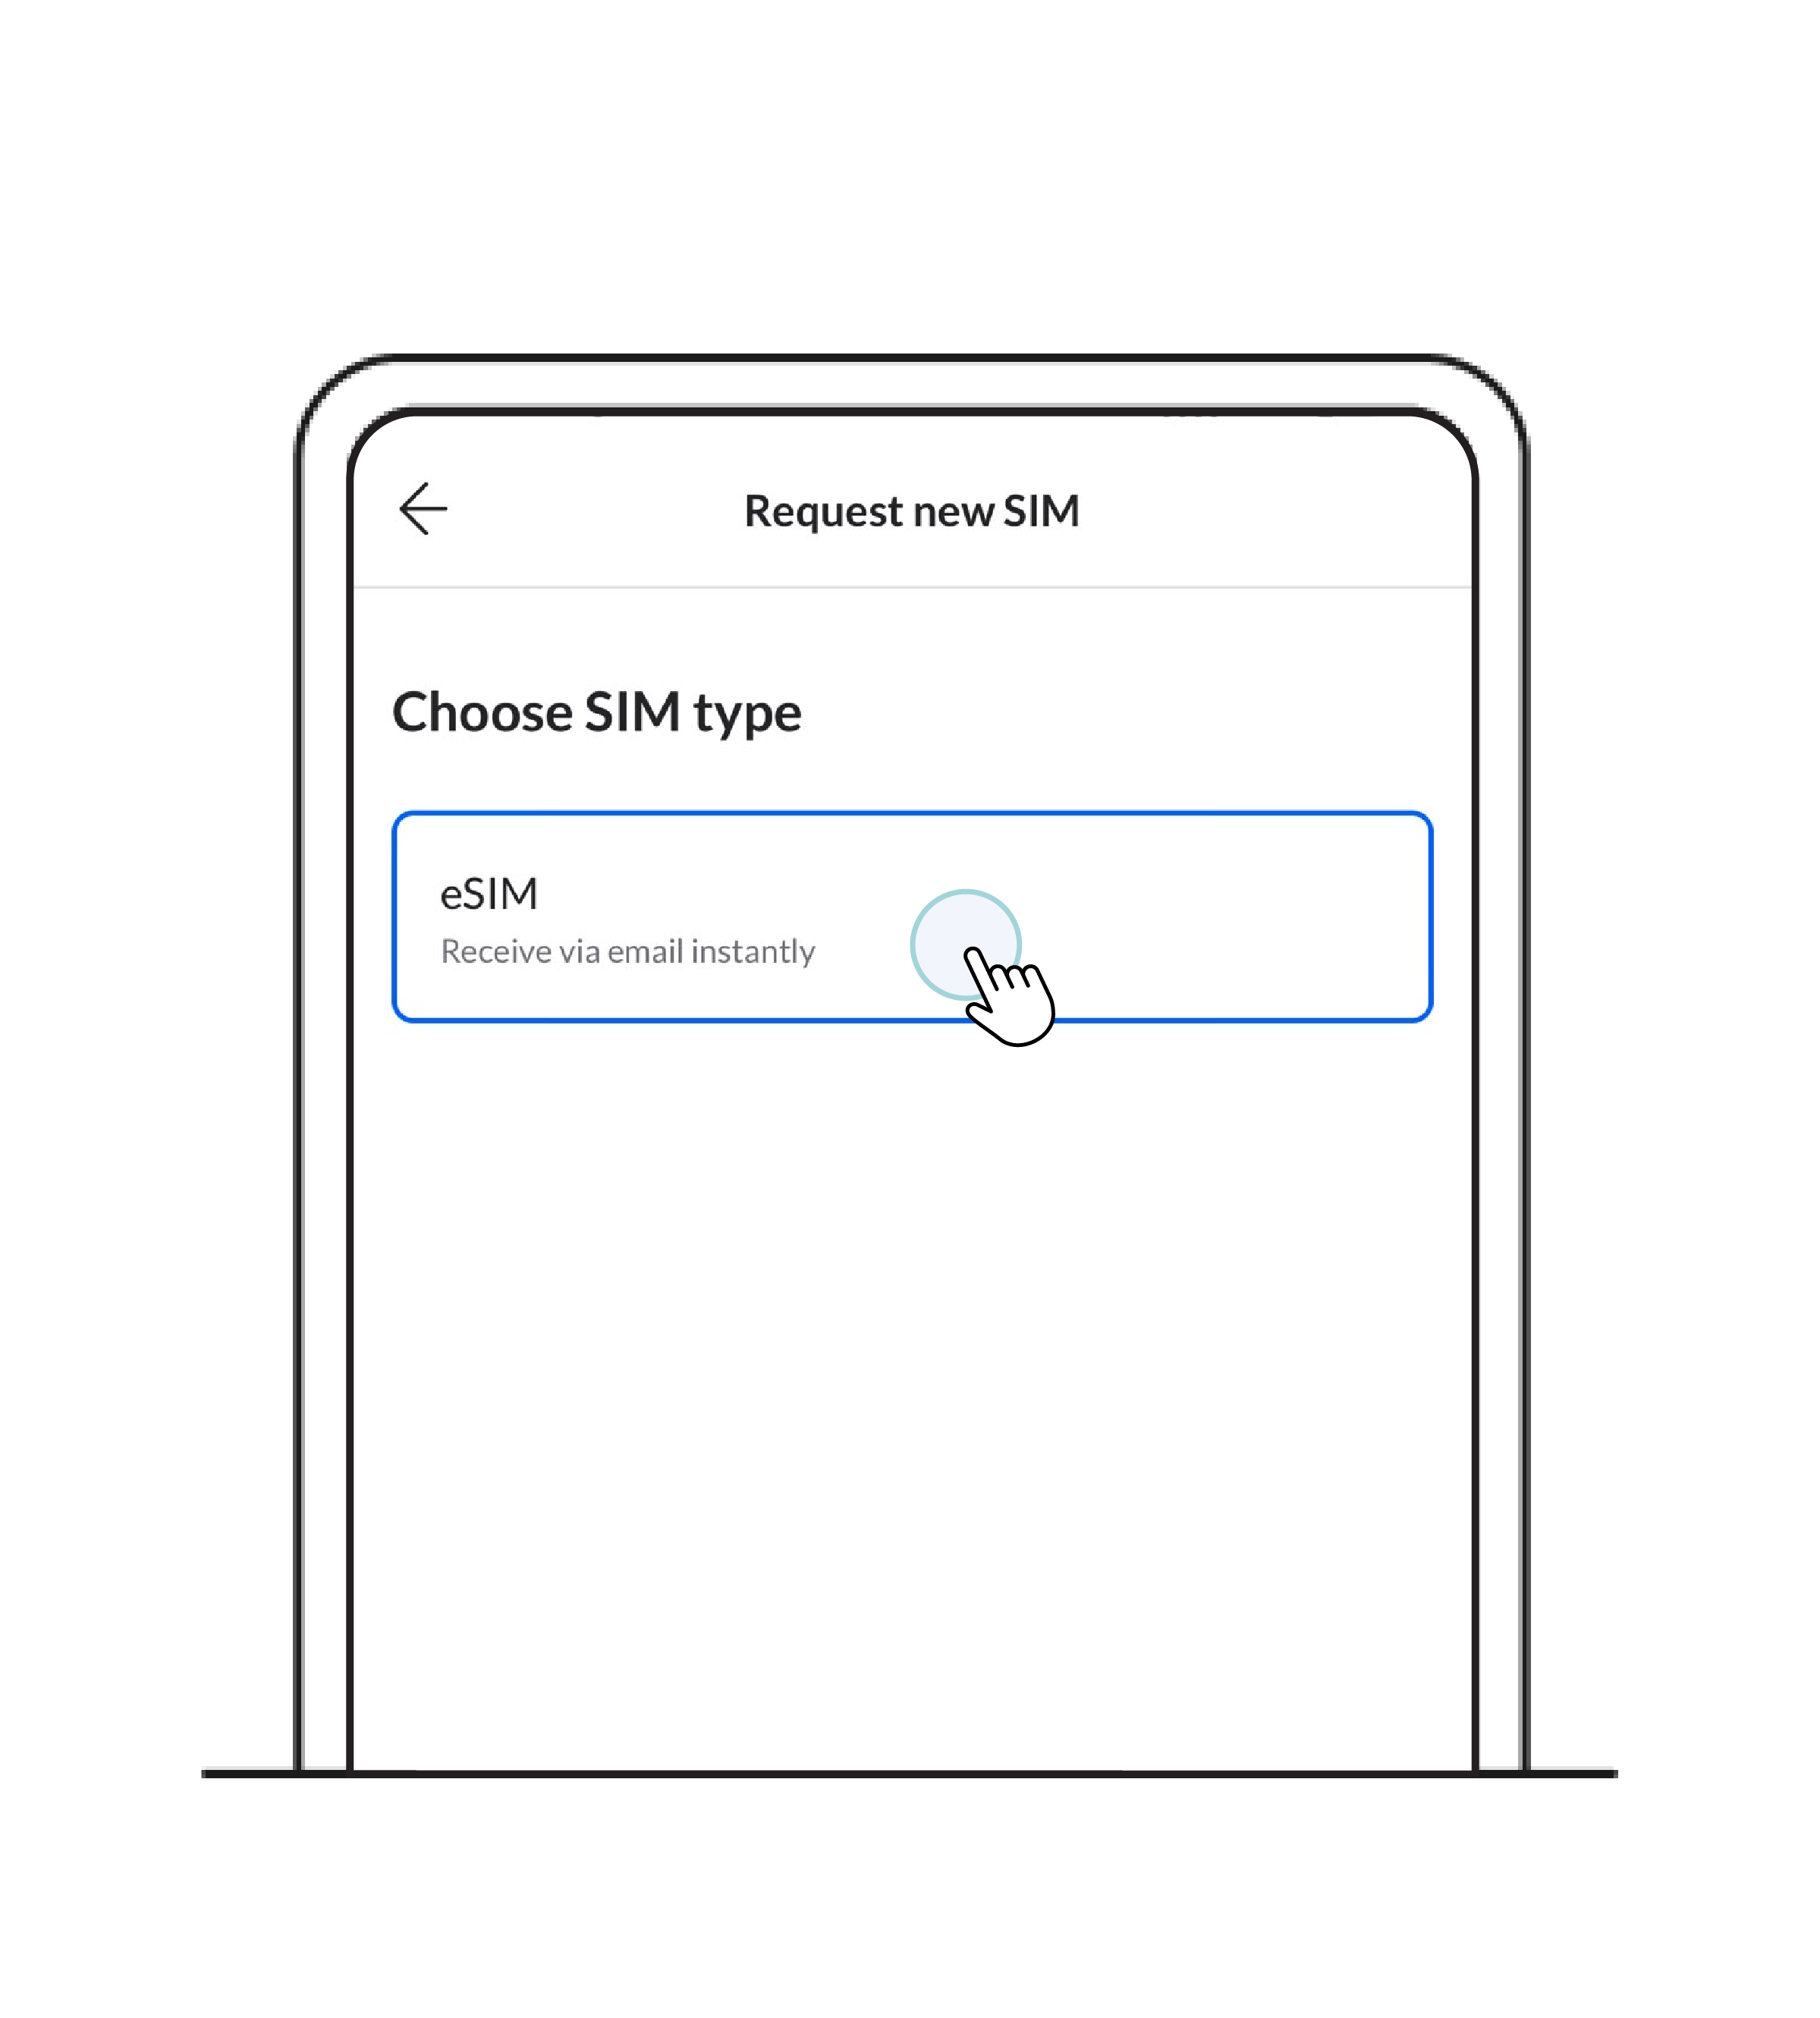
2. Tap on Request new SIM.
3. Choose your SIM type and tap Next.
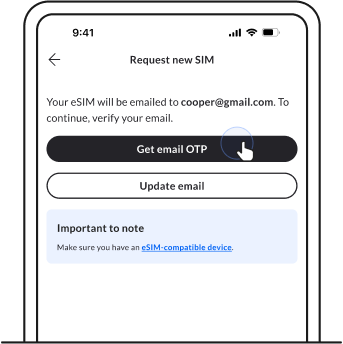
4. Getting an eSIM? Make sure your email is correct and tap on Get email OTP.
5. After entering your OTP, continue with verification via Singpass.
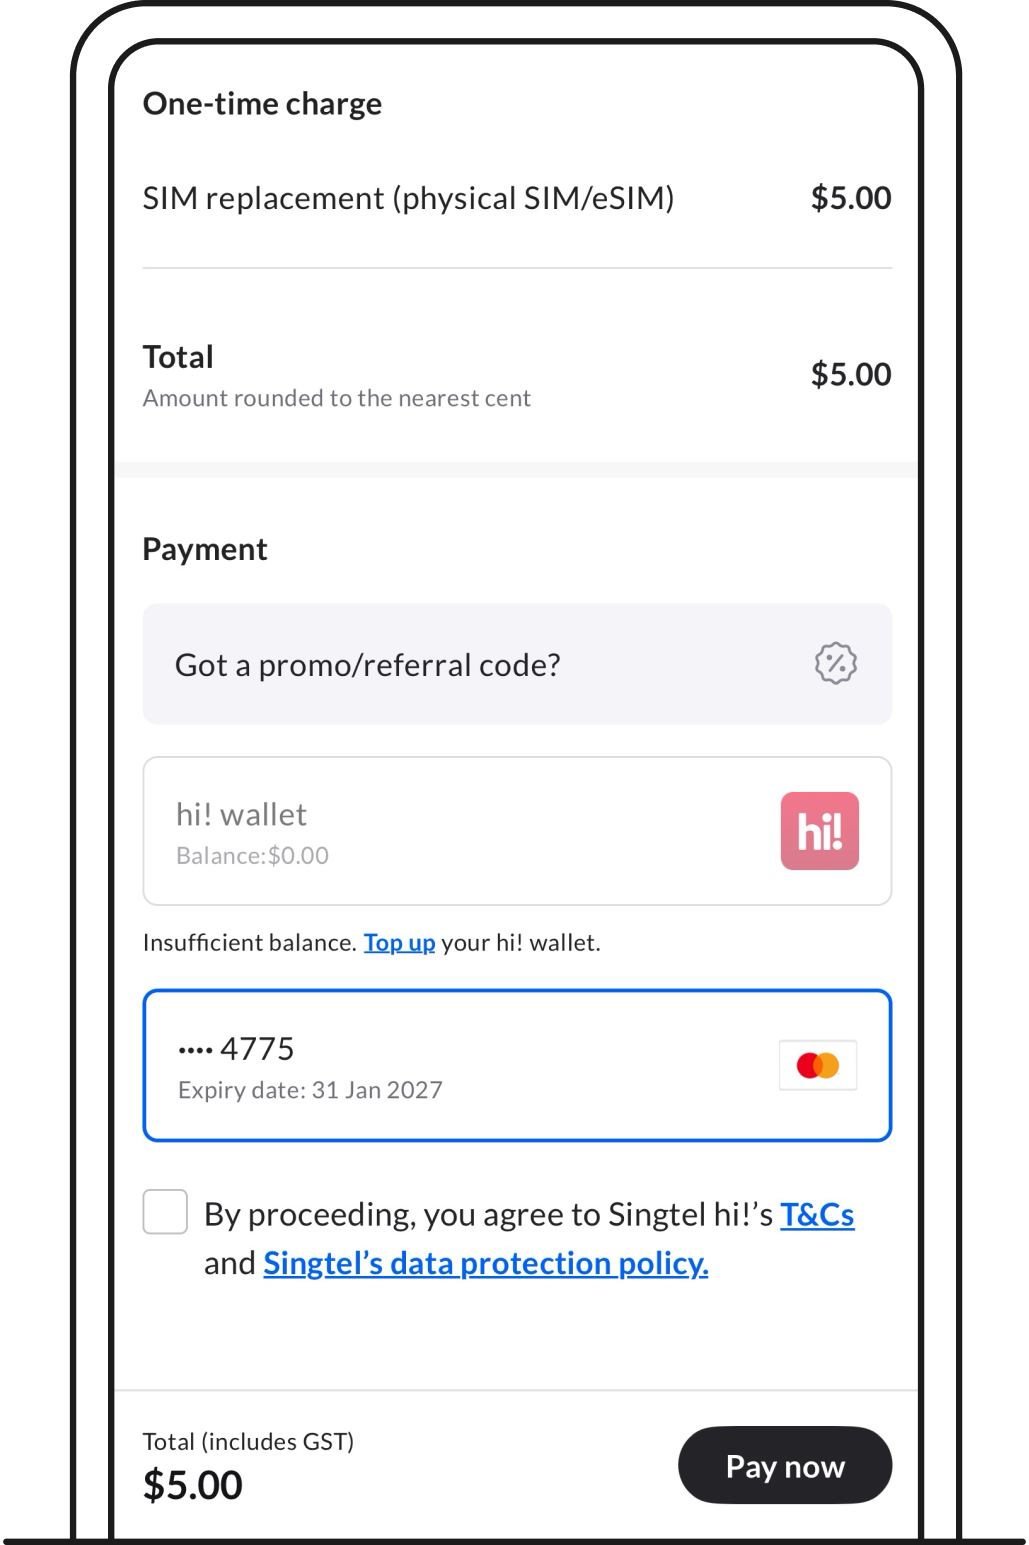
6. Review your details and tap on Pay now. You’ll be redirected to our payment platform to complete the transaction.
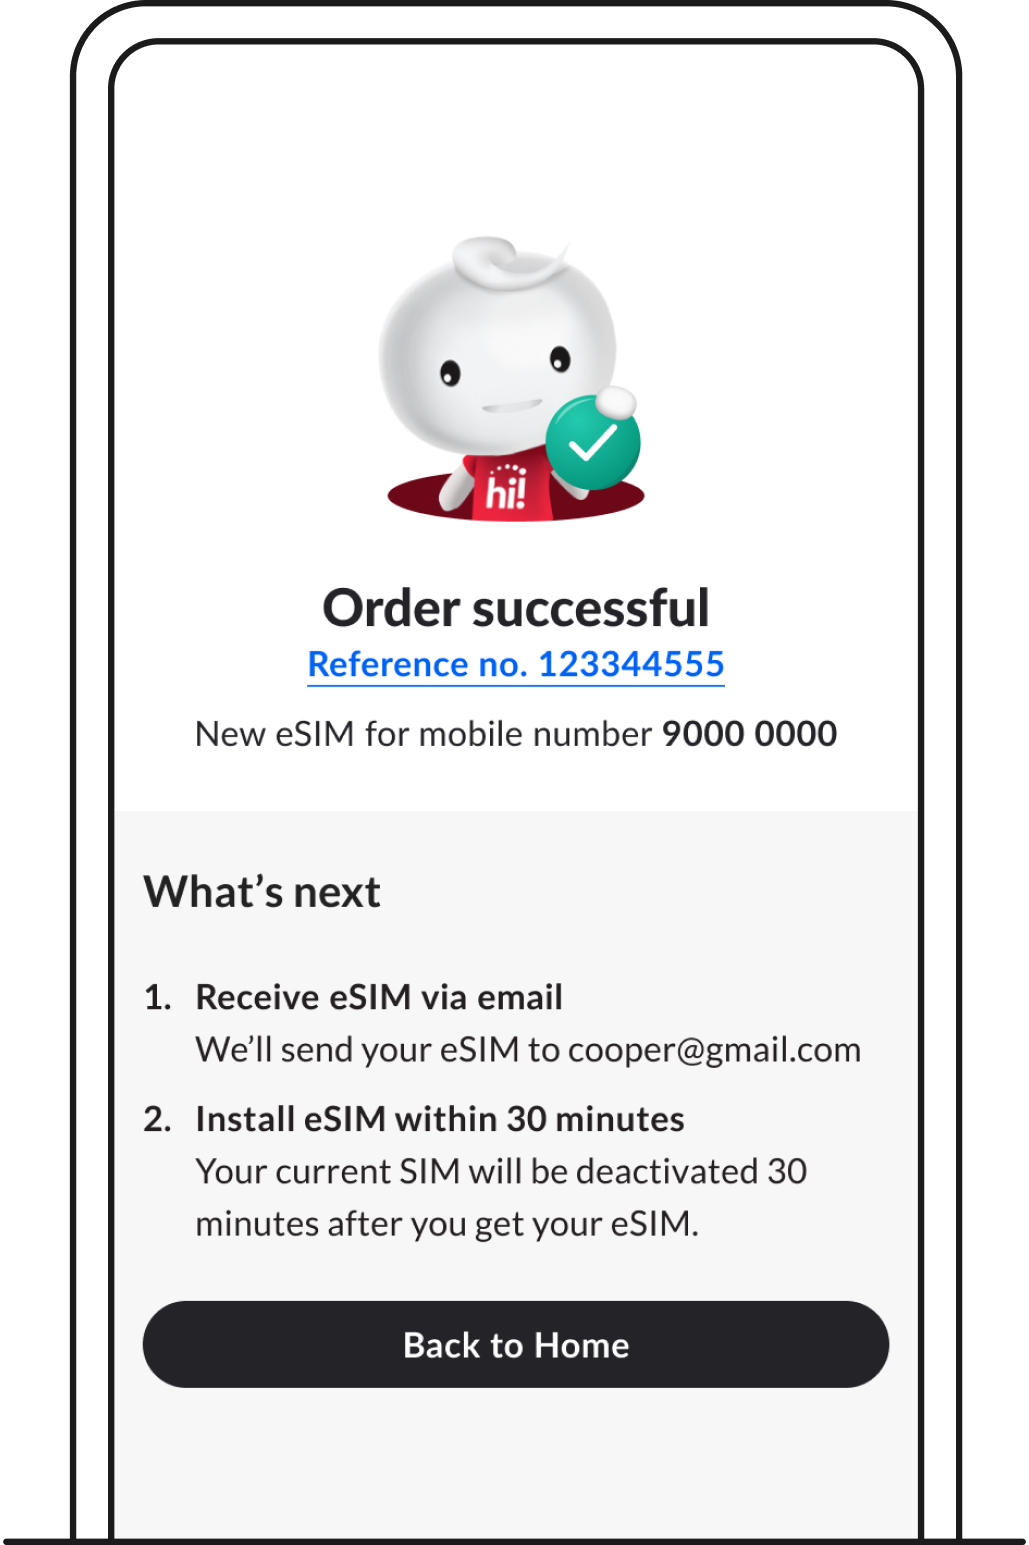
7. Upon order confirmation, review your next steps.
Roaming
You’ll be able to receive SMS overseas even without an active roaming plan — as long as the country you’re in still supports 3G. But you won’t be able to receive calls.
As hi! roaming plans are data-only, you won’t be able to send SMSes and make calls overseas as well.
Once you’ve used up your roaming plan, there won’t be any excess charges incurred, including Pay-Per-Use charges.
Just get another roaming add-on to continue roaming overseas.
If your base plan includes roaming, that data will be used first when you're overseas. Any roaming add-ons you’ve bought will be used next, starting with the one that expires soonest.
1. Check that you’ve enabled mobile data and data roaming.
2. Ensure that Access Point Network (APN) setting is set to ‘hicard’.
3. Connect to the preferred operator on your device settings.
To connect to the preferred operator:
iOS: Settings > Mobile Service > Network Selection > Turn off Automatic > Select partner operator
Android: Settings > Connections > Mobile networks > Network operators > Turn off Select automatically > Select partner operator
All unused data on any roaming plan or add-on will expire at 11:59PM (Singapore time, GMT+8) on the expiry date.
No surcharges or refunds apply for unused data.
Your data roaming speed may vary depending on:
IDD
Our IDD call covers 20+ destinations. To make IDD calls from Singapore, dial <019>.
Billing & payment
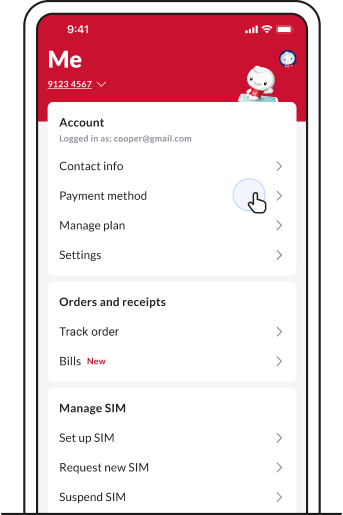
1. Log in to Singtel hi! app > Me.
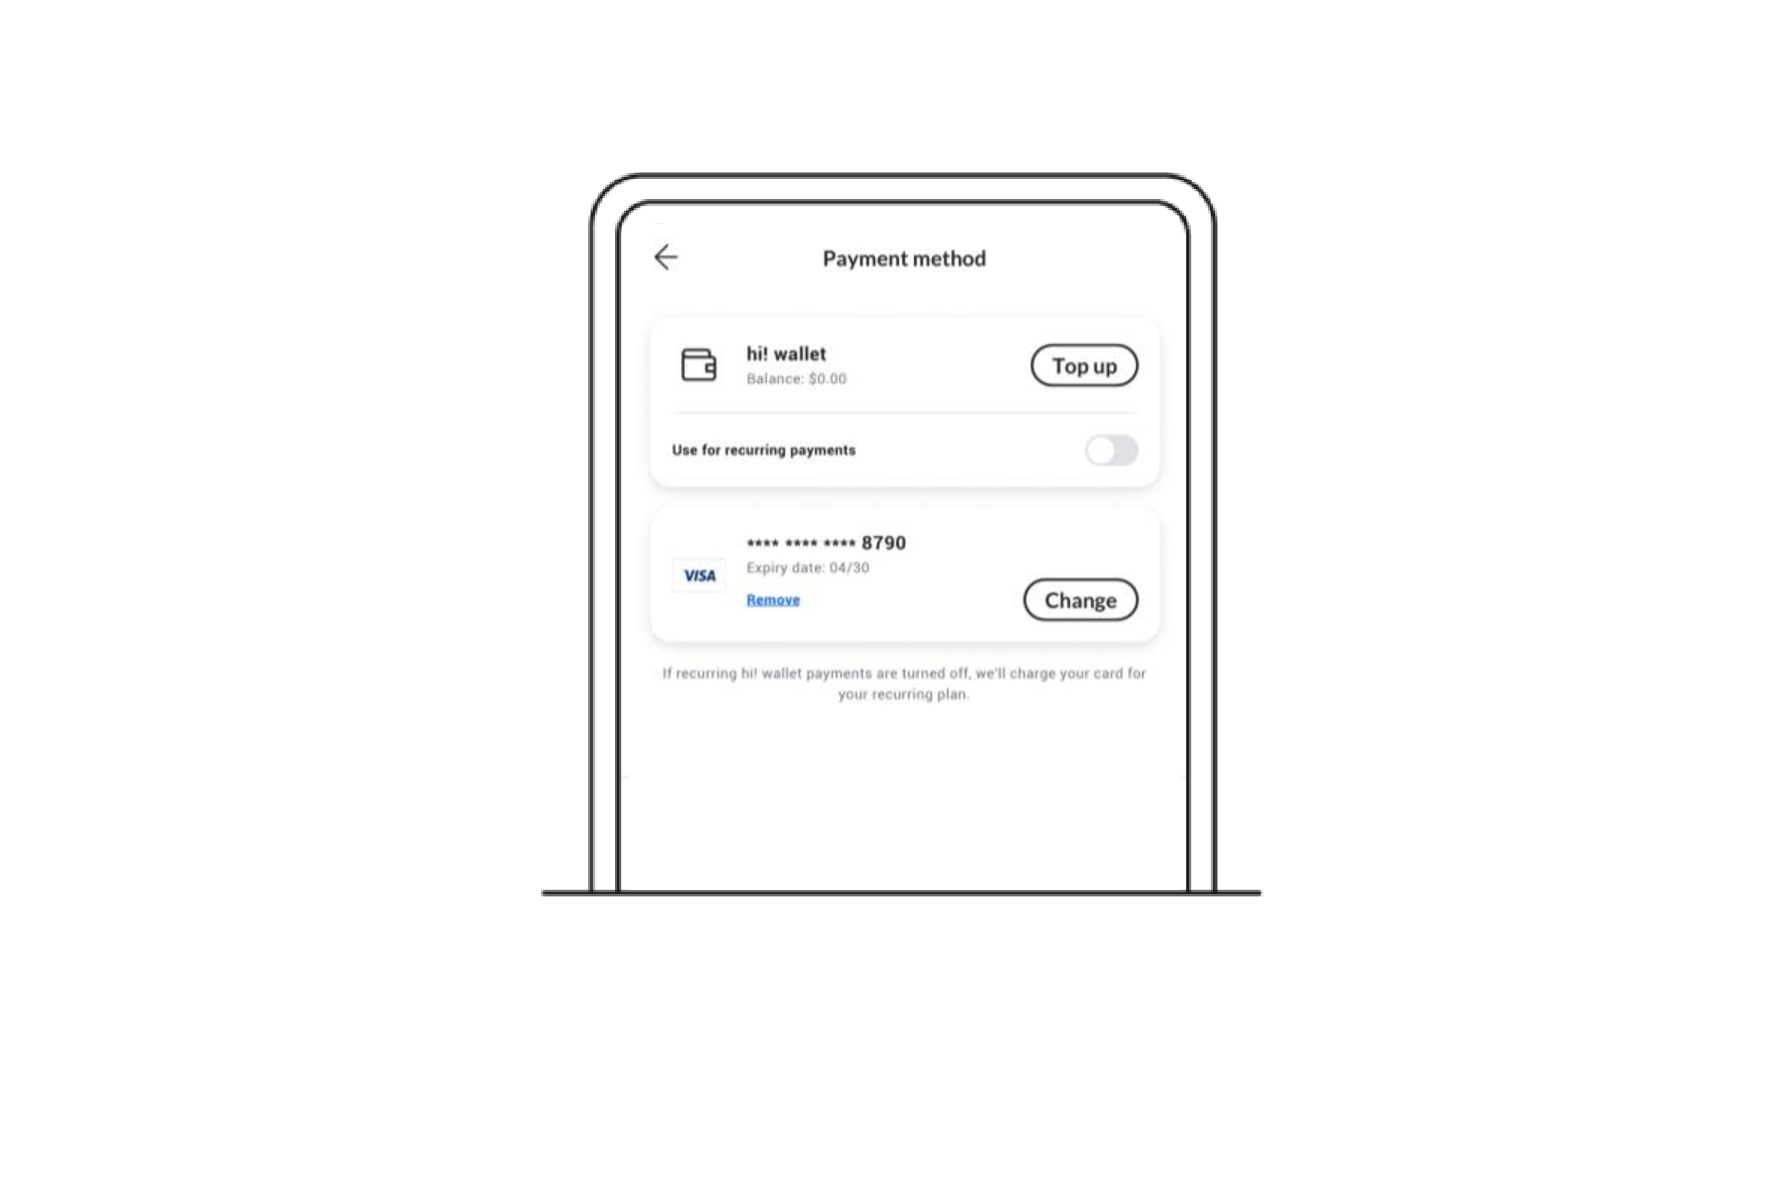
2. Tap on Payment method. You may choose to enable hi! wallet or add a new card for recurring payments. Do ensure that your hi! wallet has sufficient funds for the next recurring payment.
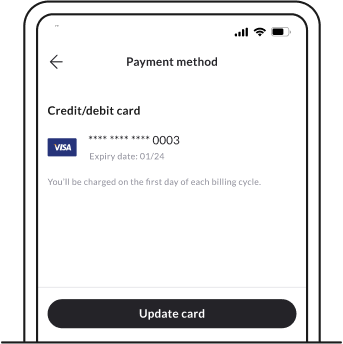
3. You’ll be redirected to another platform to enter your new card details.
4. Once you’ve completed verification, your new card will be updated in your profile.
Got a new number?
Transferring your number into hi! by Singtel?
We’ll assign you a temporary hi! number to use while your port-in is in progress.
Account & services
If you're switching from heya to hi!, you may be asked to update your email address to receive important notifications and continue using full hi! services.
When you log in with an email on hi!, you can:
When you log in using your mobile number, you will not be able to request a new SIM.
You can update your preference to receive telemarketing communications on Singtel hi! app. Go to Me > Settings.
If you opt in, you can expect to receive offers which include:
You can manage your preference to receive or block international incoming calls and SMSes on Singtel hi! app. Turning this feature on helps protect you from potential scams.
Go to Me > Settings to update your preference.
By default, this feature is turned on — which means you will not be able to receive international incoming calls and SMSes.
To transfer your hi! by Singtel number to another provider, you'll need to make the number transfer request with your new provider.
If you port out your number within 90 days of activating your hi! plan, a $30 administration fee applies.